How to organize files in DAM
In DAM, you can organize files using various methods such as folder structures, tags, attributes, and more. For more information, refer to our concept article about DAM.
How to add folders and set permissions
Here is a step-by-step guide for creating a folder structure in DAM and setting permissions for different roles (for more information about user management, click here).
Follow these steps to organize folders in DAM:
- Right-click on a folder or click on the three dots that appear when selecting a folder.
- Choose "Create Folder" (or "Rename," "Delete," or "Move").
Follow these steps to set permissions:
- Right-click on a folder or click on the three dots that appear when selecting a folder.
- Choose "Permission."
- Select the desired permissions for a specific role (remember to uncheck "Inherit permissions from the parent folder" if needed).
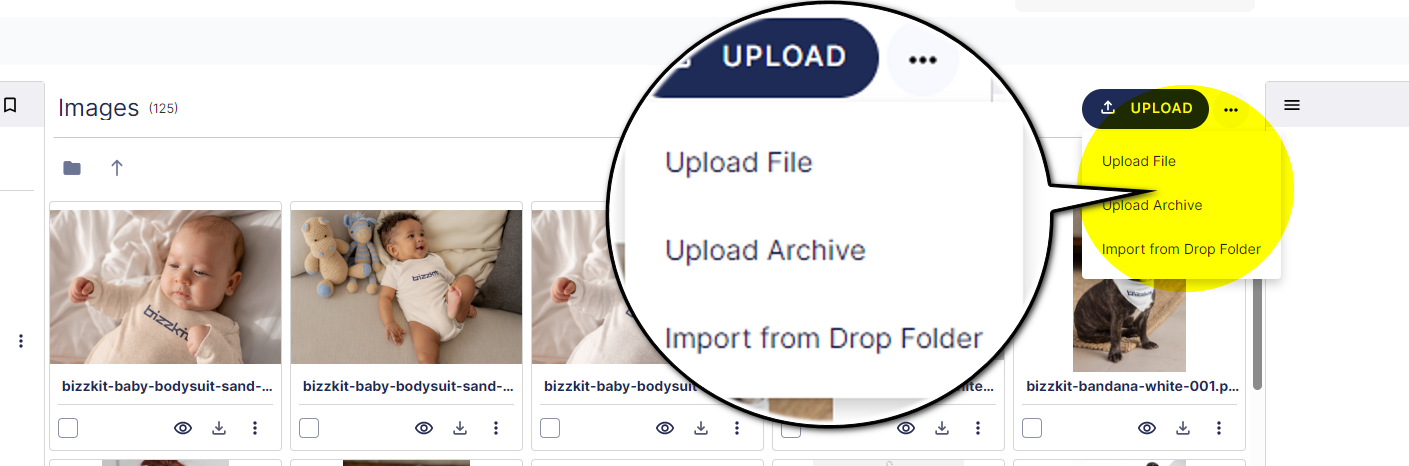
How to upload files
You can upload files to DAM in numerous ways:
- The simplest method is to select a folder and then drag and drop files from the operating system's file explorer.
- Alternatively, you can right-click on a folder and choose "Upload," or click the "Upload" button.
- For a more advanced approach, consider uploading a zip file to a folder. To achieve this, click the three dots beside the "Upload" button and select "Upload Archive."
Tip
After uploading a file, you can add a localized, searchable description text by clicking in the "Description" field at the bottom of the "Details" tab in the Property window. Choose the desired language from the top bar.
How to use tags
Here is a step-by-step guide for using tags as a way to organize files in DAM.
Follow these steps to add tags to a single image:
- Click on an image. In the property window (far right), click the "Tags" tab.
- Enter a tag name and press enter.
Follow these steps to add tags to multiple images:
- Select multiple images.
- Click the three dots in the property window (far right).
- Select "Add tags to selection."
- Enter a tag name and press enter.
Follow these steps to navigate via tags:
- Click the hamburger icon in the item explorer (far left).
- Click "Tag index," "Newest tags," or "Most popular tags."
Follow these steps to manage tags:
- Click the "Settings" icon.
- Click the "Tags" menu.
- Edit, Delete, or Translate a specific tag.
Info
To use a translated tag, select the desired language in the top menu. Please note that tags are not searchable.
How to Use Attributes
Attributes are a way to add additional metadata to files in DAM. In addition to EXIF (Exchangeable Image File Format) attributes, you can create your own key-value based attributes, allowing the value to be included in search results. Here is a step-by-step guide to creating and using attributes and refer to this article for more information.
Follow these steps to create an attribute:
- Click the "Settings" icon (top right).
- Navigate to the "Attributes" tab.
- Click "Create."
- Add a Name, Indexing Behavior, and Type (refer to this article).
- Click "Save."
- If you want the attribute to be part of a group, click "Attribute Category."
- Add a name and select the attributes you want in the group.
- Click "Save."
Follow these steps to add an attribute to a file:
- Select a file in the content window.
- In the property window (far right), click on the "Attributes" tab.
- Select an attribute and add a value.
- Click "Save."
Follow these steps to add an attribute to multiple files:
- Select multiple files.
- Click the three dots in the property window (far right).
- Select "Add attributes to selection."
- Choose to merge or overwrite multi-value attributes.
- Select the attribute.
- Enter a value.
- Click "Save."
Info
Please note that there might be a delay before an attribute value becomes searchable. This delay depends on the DAM installation configuration and the frequency of the background job runner's execution.
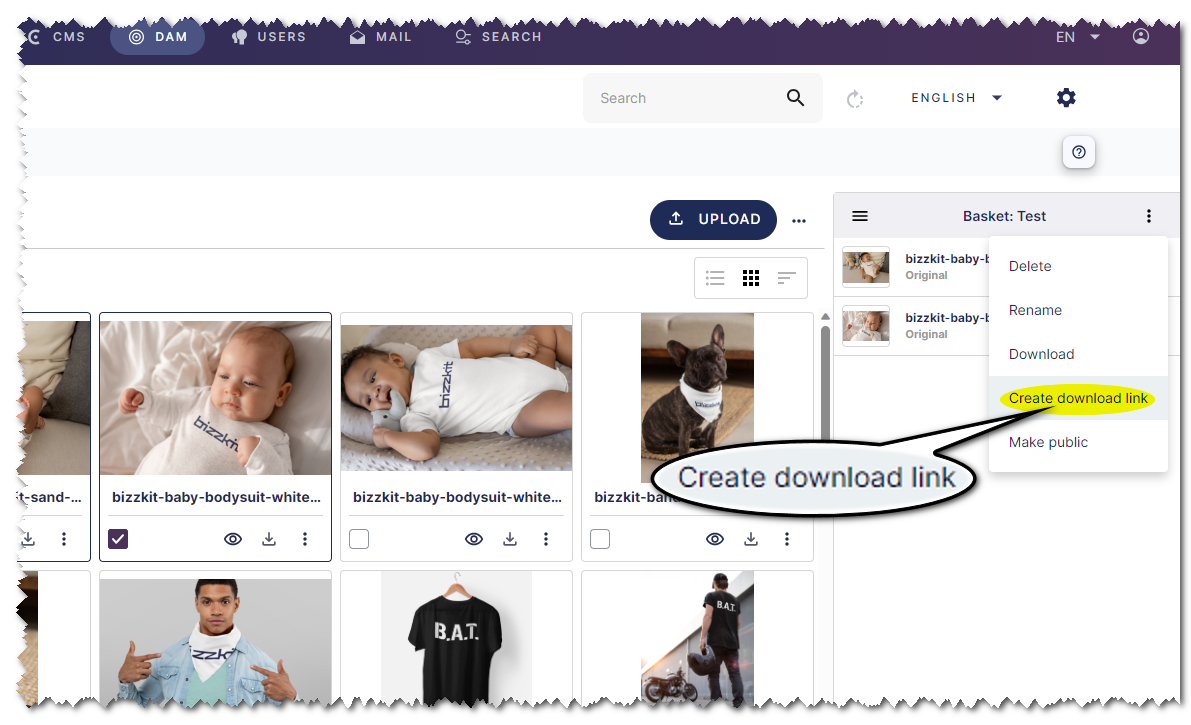
How to Create a Download Link
Files in DAM can be bundled into a zip file and made downloadable. This feature is especially useful for sharing files with external partners. Here's how:
- Select one or multiple files.
- In the property window, click the three dots and create a new basket with a name. The selected files will now be visible in the same window.
- Click the three dots again and select "Create a download link."
- Set a start and expiration time for the zip download availability.
- Click "Create a download link."