Getting started
When you receive access to Bizzkit User Management, you also receive a bootstrap machine client in the introductory email. Use that client to complete the initial setup in Scalar, create the first administrator, and continue with the downstream clients that fit your own integrations.
This guide uses the Scalar UI on your own environment's /scalar path, for example https://example-iam.bizzkit.cloud/scalar.
Open Scalar and authenticate
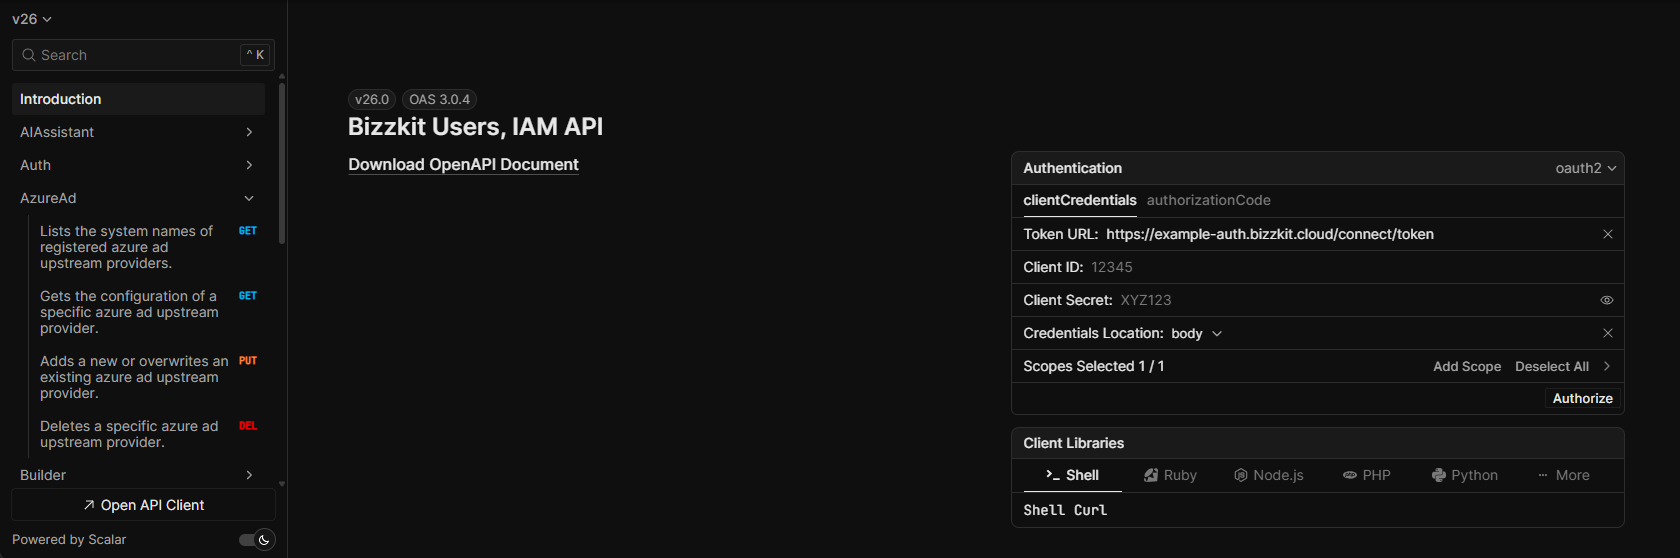
- Open the
/scalarpage on your environment. - In the Authentication panel, keep oauth2 selected and choose clientCredentials.
- Enter the bootstrap machine client's Client ID and Client Secret from the introductory email.
- Keep the
iam/scope selected. - Click Authorize.
After authorizing, you can use Test Request directly from the IAM endpoints in Scalar.
Configure an upstream provider
To let users sign in, configure at least one upstream provider. This guide uses Azure AD as the concrete example, but the same overall approach also applies to Google and Auth0.
- In Scalar, open the AzureAd section.
- Open
PUT /api/upstream/AzureAd/{id}. - Choose a stable value for
{id}. For Azure AD, the sign-in path is built from the Azure AD prefix plus the id. For example, the idhesehusgives the sign-in path/signin-azureadhesehus. Avoid changing the id later unless you also update the provider configuration on your identity-provider side. - Fill in the request body with the values from your Azure AD app registration.
- Send the request from Scalar.
Example request body:
The most important Azure AD fields are:
displayName: The label shown to users in the sign-in flow.clientId: The application/client id from Azure AD.clientSecret: The client secret from Azure AD.tenantId: The Azure AD tenant id.trustAllUsers: Controls whether all successfully authenticated users from this provider may sign in.defaultUserRoles: Roles that should be assigned automatically to users created through this provider.
Understanding trustAllUsers
Set trustAllUsers to true when every user who can authenticate through the upstream provider should be allowed to sign in to Bizzkit. This is useful when the provider itself is already the access boundary.
Leave trustAllUsers as false when you want tighter control over who can access the environment. In that setup, you typically create or manage access intentionally instead of admitting everyone from the upstream provider.
Understanding defaultUserRoles
Use defaultUserRoles to assign one or more roles automatically to users created through the upstream provider. This is useful for baseline access, for example when everyone from a provider should receive the same standard role set.
Keep this list minimal. Avoid using broad administrative roles as default roles unless that is an intentional and tightly controlled setup.
Google and Auth0
Google and Auth0 upstream providers expose the same kind of onboarding flow in Scalar through their own endpoints:
PUT /api/upstream/Google/{id}PUT /api/upstream/Auth0/{id}
The same guidance for trustAllUsers and defaultUserRoles applies there as well.
Redirect URI
If your identity provider requires a redirect URI, use your own environment URL together with the sign-in path generated for the provider type and id you chose. For Azure AD, the id hesehus gives the path /signin-azureadhesehus, which on the example environment becomes https://example-iam.bizzkit.cloud/signin-azureadhesehus. Because the id is part of that path, choose it carefully before you put the provider into use.
Client secret expiry
Azure AD client secrets expire. Track the expiry date and update the upstream-provider configuration before the secret becomes invalid.
Create the first administrator
After the upstream provider is configured, create a dedicated administrator account.
- Open
POST /api/usersin Scalar and create the user with the correct email address and full name. - Copy the returned
id. - Open
POST /api/users/{userId}/roles. - Assign the
adminrole to that user. - Sign in with the upstream provider and verify that the new administrator can access the environment.
Example request body for POST /api/users:
Example request body for POST /api/users/{userId}/roles:
Creating the first administrator explicitly is safer than assigning admin broadly through defaultUserRoles.
Continue with downstream clients
Once the environment is bootstrapped, create the downstream clients your own solutions need.
- Machine clients are for system-to-system access.
- Interactive applications are for trusted server-side applications.
- Client-side applications are for browser-based applications such as SPAs.
The main endpoints are:
PUT /api/downstream/MachineClient/{id}PUT /api/downstream/InteractiveApplication/{id}PUT /api/downstream/ClientSideApplication/{id}
If you do not provide a client secret when creating a machine client or interactive application, create one afterwards through the corresponding /secrets endpoint in Scalar.
Example request body for a machine client:
Available built-in scopes
When configuring allowedScopes, copy the scope values exactly. The trailing / is required.
The built-in scope names in a standard setup are:
| Scope | Typical API |
|---|---|
aiapi/ |
AI-related APIs |
damapi/ |
DAM APIs |
eventtrackingapi/ |
Event Tracking APIs |
iam/ |
User Management and IAM APIs |
mailapi/ |
Mail APIs |
pimapi/ |
PIM APIs |
searchapi/ |
Ecommerce Search APIs |
Only grant the scopes a client actually needs. For example, use damapi/ for a client that must call DAM APIs, and keep iam/ for clients that need to manage User Management itself.
You can also inspect the currently available protected APIs in Scalar through GET /api/downstream/ProtectedApis.
API reference
Use the full API reference when you need field-level details, response shapes, or less common endpoints.